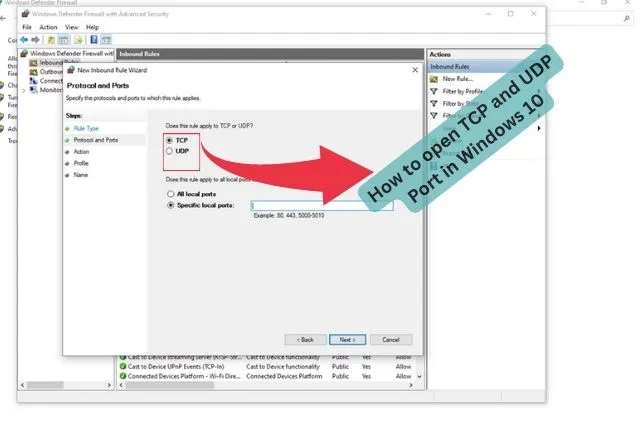
How to open TCP and upd port in Windows 10
How to open TCP and UDP port in Windows 10 is a straightforward process that can be completed in a few simple steps. The process involves using the built-in Windows Firewall to allow or block specific ports.
Here’s how to open a TCP or UDP port in Windows 10:
Step 1: Open the “Control Panel“.
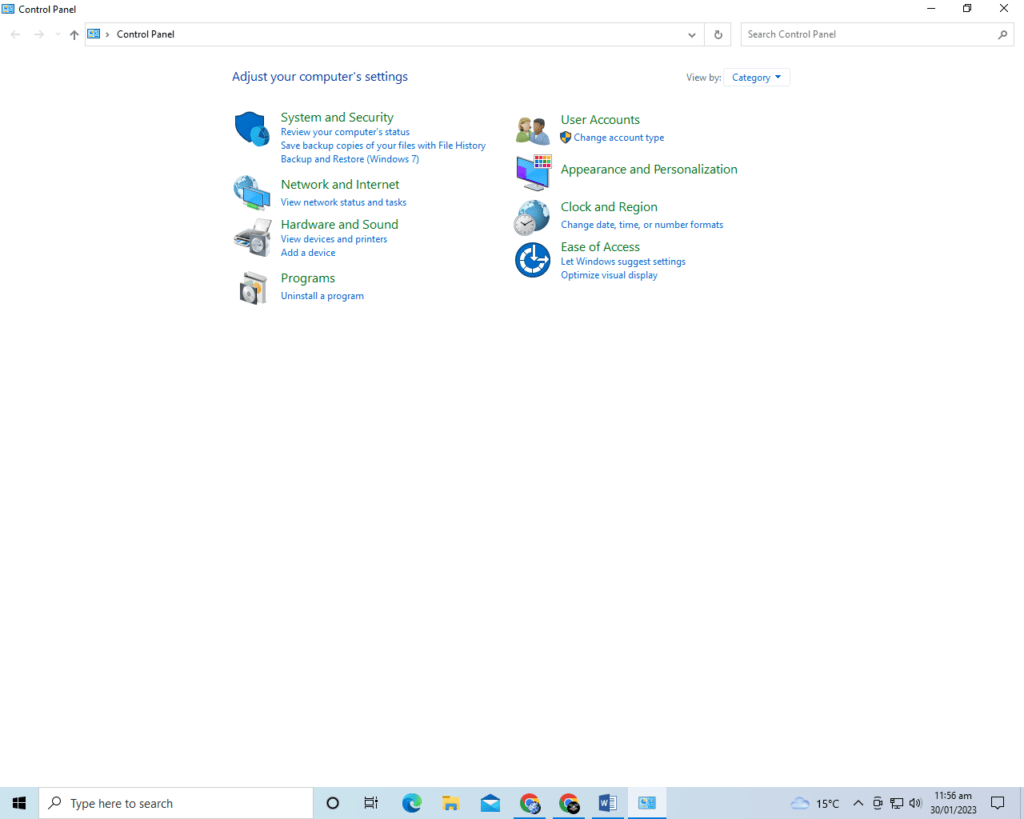
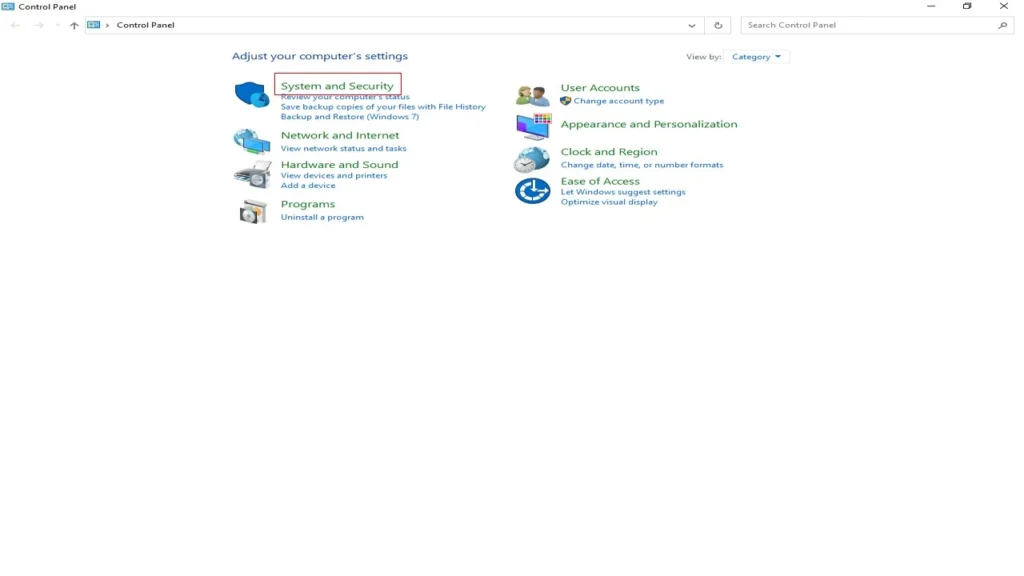
Step 2: Click on “System and Security“.
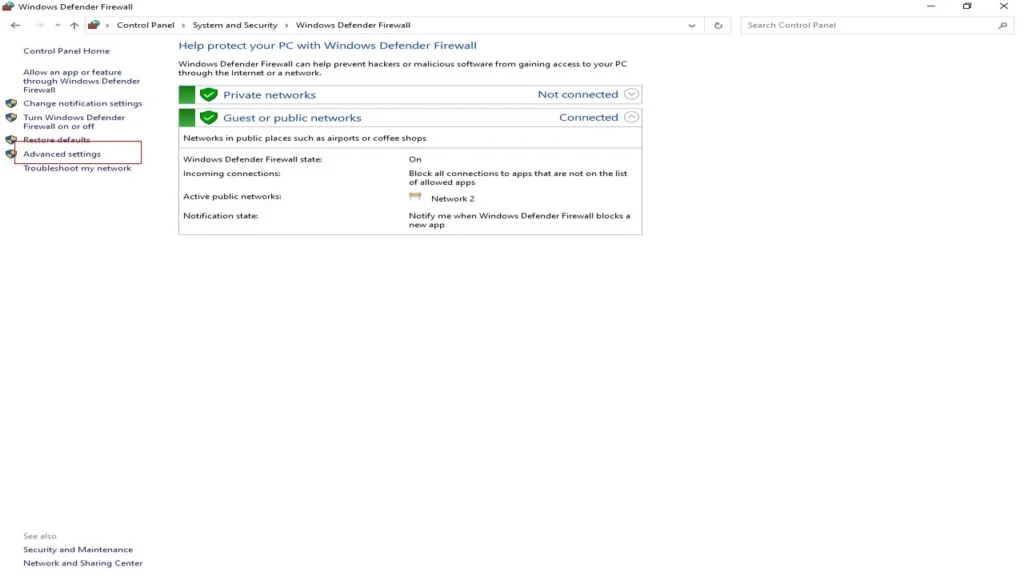
Step 3: Click on “Windows Defender Firewall“.

Step 4: Click on “Advanced Settings“.
Step 5: Click on “Inbound Rules“.
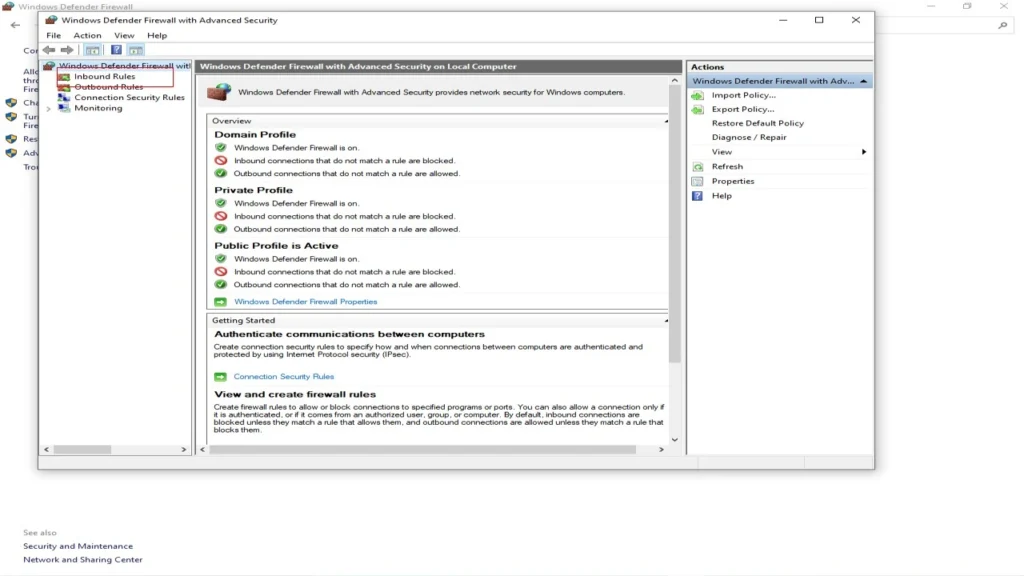
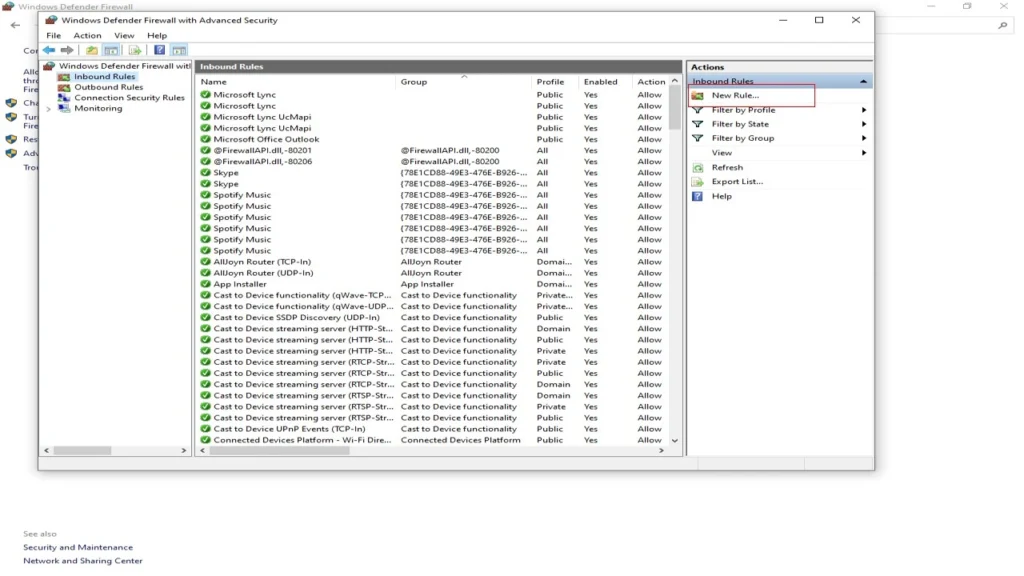
Step 6: Click on “New Rule“.
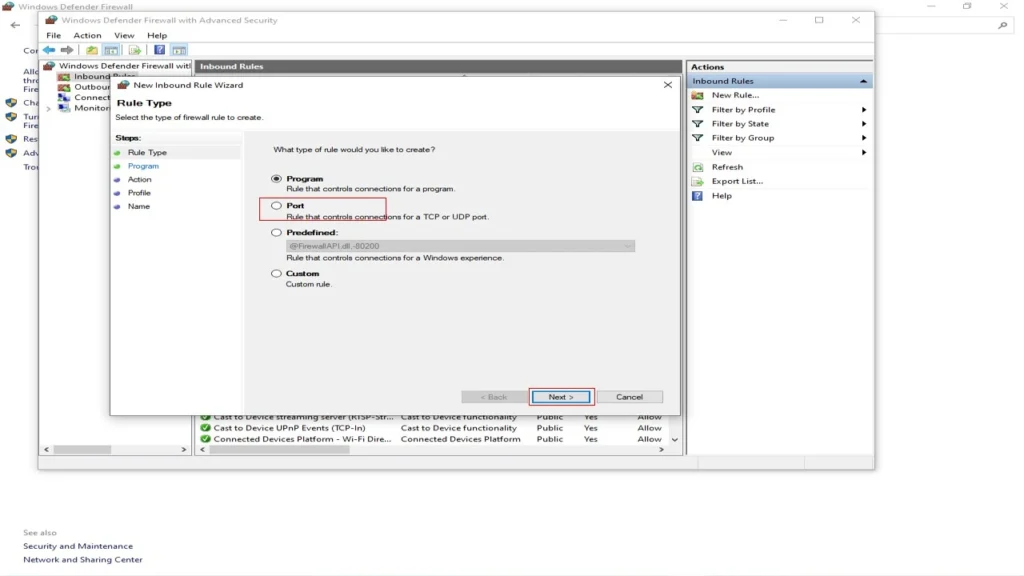
Step 7: Select “Port” and click “Next“.
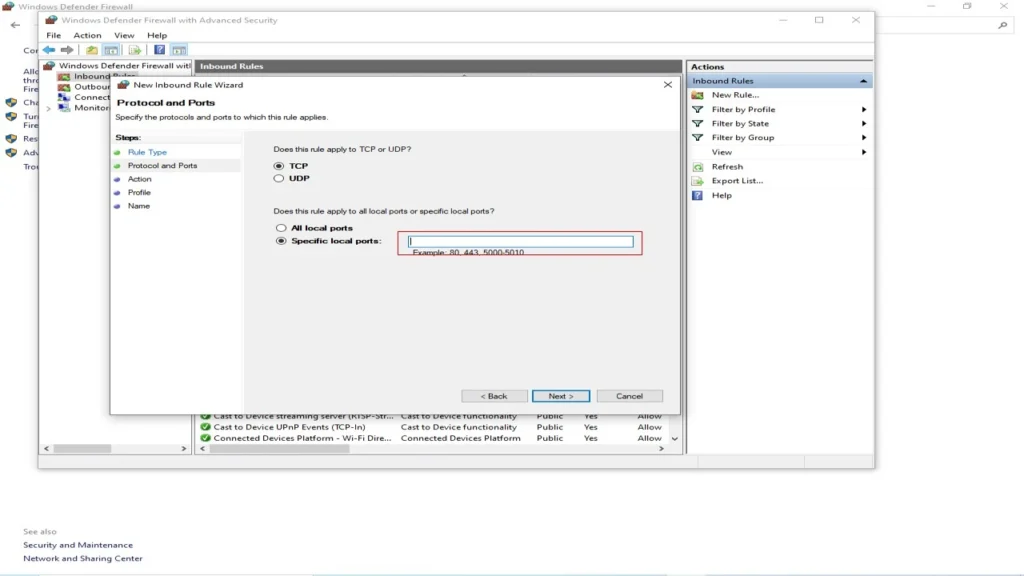
Step 8: Select TCP or UDP, depending on the type of port you want to open.
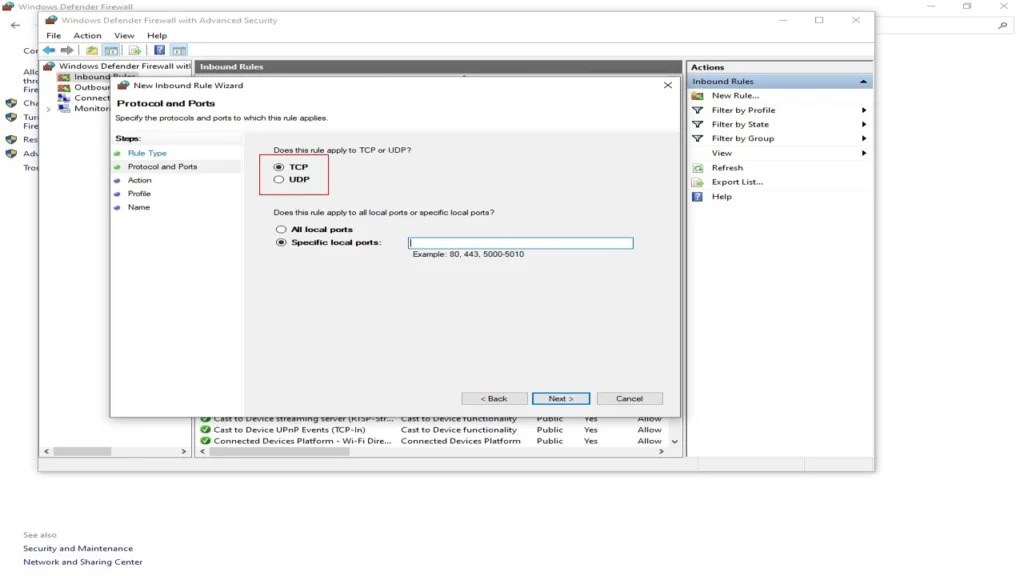
Step 9: Type in the specific port number you want to open, or choose a predefined service from the drop-down menu.
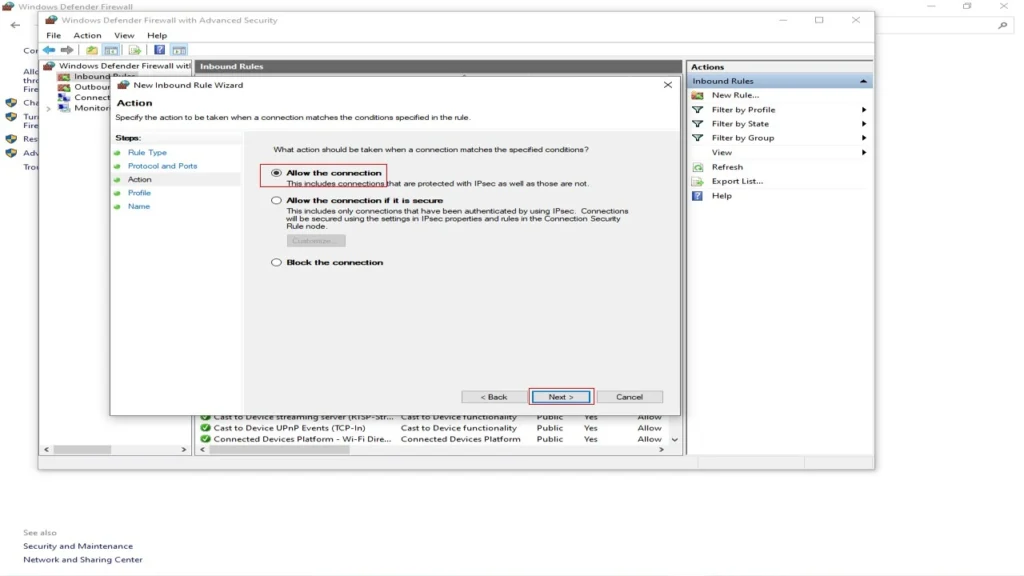
Step 10: Choose “Allow the connection” and click “Next“.
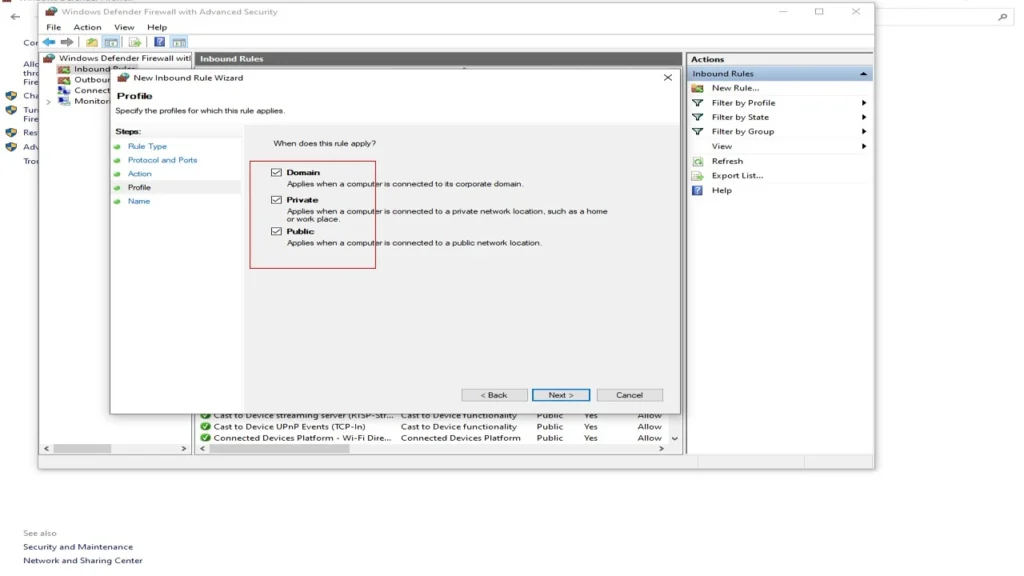
Step 11: Select the profile that applies to your network, such as Domain, Private, or Public.
Step 12: Enter a name for the new rule and click Finish.
Once you have completed these steps, the specified TCP or UDP port should be open and accessible on your Windows 10 computer. Keep in mind that opening ports on your firewall can increase the risk of security vulnerabilities, so it’s important to only open the ports that are absolutely necessary for your applications to function properly.
In addition, it is always recommended to have a solid and reliable firewall software or endpoint protection tools in place to mitigate any security risks that might arise from opening ports.
It’s also a good practice to monitor your network for any suspicious activity and keep your computer and other software up-to-date to prevent any security breaches.
