How to Take Backup of Windows 10
Windows 10 provides several options to backup the operating system (OS) and protect important data.
In this article, we will learn how to take backup of Windows 10 OS in a laptop or desktop PC with step-by-step instructions. Protect important data and files with a system image backup, Windows Backup and Restore, or File History.
- Create a System Image Backup A system image backup is a complete copy of the operating system, installed programs, and personal files. It can be used to restore the PC to the same state in case of a system failure or crash. To create a system image backup in Windows 10, follow these steps:
- Open the “Control Panel“

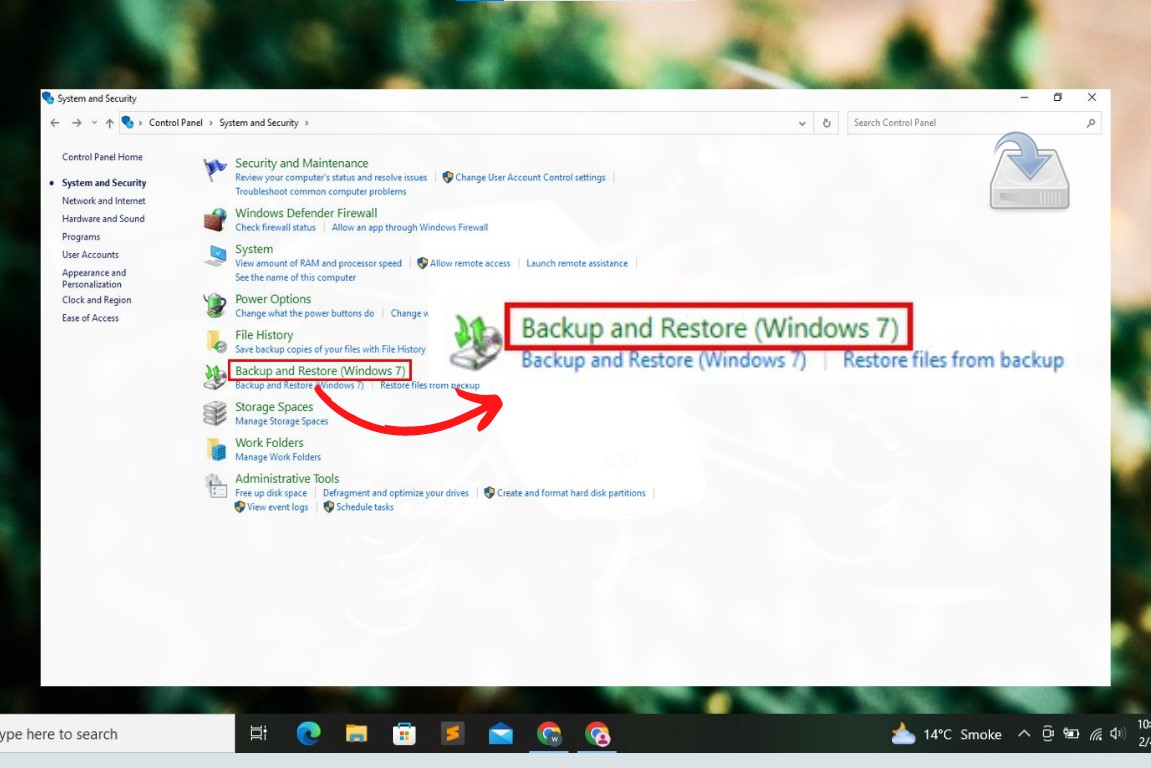
- Click on “System and Security” and then click on “Backup and Restore (Windows 7)”


- Click on “Create a system image” on the left side of the window

- Select the location where you want to store the backup, such as an external hard drive or network location

- To finish the backup procedure, follow to the instructions displayed on screen.

- Use Windows Backup and Restore Windows Backup and Restore is another tool to backup the operating system and personal files in Windows 10. To use it, follow these steps:
- Open the “Control Panel“
- Click on “System and Security” and then click on “Backup and Restore (Windows 7)”

- Click on “Set up backup” on the left side of the window

- Select the location where you want to store the backup, such as an external hard drive or network location

- To finish the backup procedure, follow to the instructions displayed on screen.
- Use File History File History is a built-in tool in Windows 10 that automatically backs up personal files. To use it, follow these steps:
- Open the “Control Panel“
- Click on “System and Security”

- Click on “File History”

- Connect an external hard drive or network location to store the backup

- Turn on File History and select the folders you want to back up

Conclusion
In conclusion, taking a backup of Windows 10 OS in a laptop or desktop PC is easy and important to protect important data and files. By creating a system image backup, using Windows Backup and Restore, or File History, you can ensure the safety of your data in case of a system failure or crash.


